
I decided to DIY my maternity gown, of course :)
While I got some inspirations from Pinterest, I designed it myself in order to make it easy as possible and mind you I knew it got to be an African print, annnnd you guessed it right, the pink is for the little girl I'm carrying!
You don't only have a maternity gown but also an outfit for after baby, just by closing the skirt split to the desire length et voilaaaaa!
I hope these instructions are easy to follow, I believe that there is nothing there you can't do, I taught myself all these! so,Yes, YOU can do it!
Keep in mind that this is just a guide and so you can change or add as you desire! Also I will be very happy to help, therefore don't hesitate to ask me any questions that you might have!
Items That I used
✤Fabric: Patchwork de Woodin around 146 inches x 47 inches
✤Elastic band: 2 m elastic, 20 mm width
✤Lining fabric: half a meter
✤3 floral wires, 22 gauge
✤Hot glue gun
✤Scissors
✤Tape measure
✤Sewing machine
The hair accessory

1. I used fabric, hot glue gun and 3 floral wires 22 gauge, anything you can easily bend will do, the length is not important either, just something which can go across your forehead and for you to be able to pin them at the sides. You can go ahead and glue your clips on the accessory; it is all up to you.
2. I cut the fabrics in ways to cover the wires
3. Then I braided them
4. Here you can see what it looks like after I braided the wires
5. I covered the ends of my wires braid for a better and neat finish
6. And there you have it; 2 min and you are done!
The top
I split this part into three photos: the front (the bow side), the back and the joining of both!
➤The back

1. I measured my bust 34 inches to find my fabric length, I divided 34 by 2, which is 17 inches and added 2 inches for seam allowance, now we have 19 inches in total length. My width is 4,5 inches with 2 inches as seam allowance, which give us a total of 6,5 inches. You can have a longer width if desired but keep in mind that the width of your front (the bow side) will consequently increased by 3,5 inches.
Conclusion: I cut fabric and lining 19 inches x 6,5 inches
2. Now I put the right side of my fabric and lining together and sew down both the lengths
3. Open up the fabric to reveal the right side of it and pressed it by ironing it!
4. Here I folded in and pressed my seam allowance (1 inch each sides) on the widths of the fabric
➤The front (bow side)
1. The front has been tied into a bow, so basically I have two cuts there, each length is my bust 34 inches x 2 = 68 + 2 inches as seam allowance = 70 inches. So, you will find your length depending on your bust measurement
The width of each cut is 8 inches + 2 inches seam allowance = 10 inches. Your width here will increase by 3,5 inches, if you decide to increase your width at the back (view previous photo)
Conclusion: I cut 70 inches x 10 inches, two times
2. I folded each cut into two, right side together and sewed down both lengths of the folded fabrics,
3. Turned fabric to reveal the right sides and pressed iron it
4. and I Gathered the widths on the sides where my folded fabrics are opened
➤Joining both, back and front

1. Here you can see the gathered widths of my front bow side cuts; there are two of them
2. And here, the openings we left on our back piece
3. I put the gathered width inside the cut and layered everything nicely then pinned it in order to sew them
4. This is my final result, where we see my back piece connected to the two cuts of the front bow side
The maxi skirt

1. I cut the fabric 72 inches x 47 inches. I literally put the fabric on myself to decide how maxi I want and can have it!
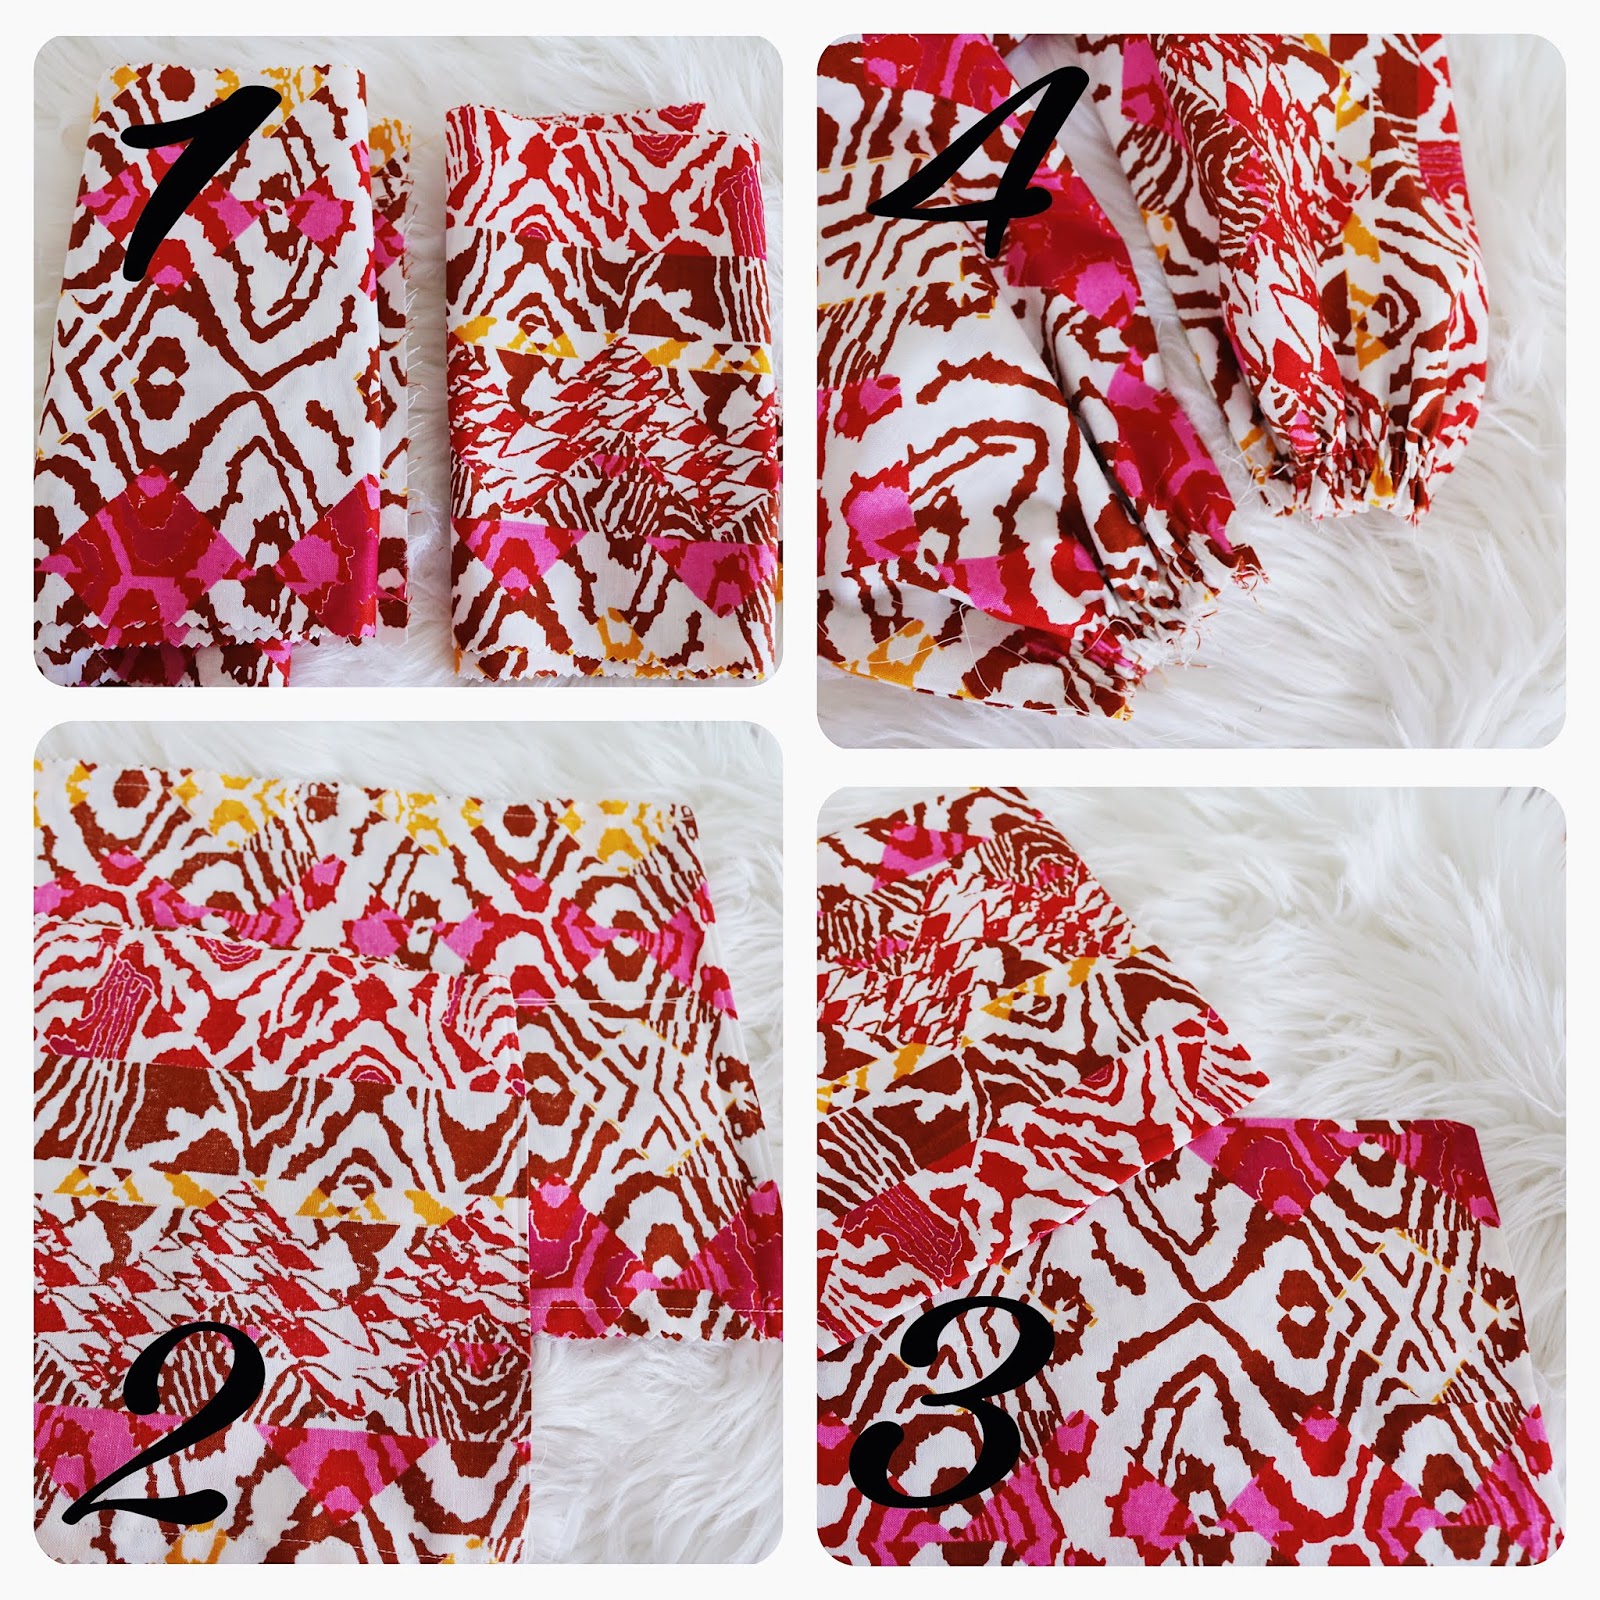
Now, I’m going to try to explain how I sew a split!
I folded the fabric right side together on the width side (47 inches) and I sewed about 3 inches down the length with a half-inch seam allowance.
I decided on the 3 inches length by taking into account the width of my elastic band (20 mm), this was the length I needed to cover the elastic band at the waist (see photo number 3)
2. On this photo, I open up the seam allowance where I stitched earlier and ironed it all the way down to reveal the split of my skirt, then I sewed on top as you can see on the picture, all the way down!
3. Here, I folded the 3 inch length I left at the top, stitched it all around while leaving an opening, where we will pull the elastic band through!
4. I measure my waist with the elastic band while pulling on it to decide how tight I want it, and then I cut it. I went ahead and attached a safety pin to the elastic band so I can easily pull it through the fabric
5. Finishing to pull the elastic band I secured it with some stitches
6. And nicely adjust it inside my waist band and closed the little opening I left earlier
7. I finished the skirt by hemming the bottom of it
8. And now I have my maxi skirt, which is literally a split skirt
Hope this was useful and inspiring! Let me know if you have tried it, or any other DIY maternity gown you did! Why not Check out my maternity photo shoot GRWM blogpost if you haven't yet!

No comments
Post a Comment